My blog is to help you connect to Stampin' Up! products, projects, ideas, techniques

and promotions to inspire, energize and fulfill your creative dreams and needs.

Showing posts with label tutorial. Show all posts

Friday, April 1, 2022

Turtle Friends Spotlight #3


Hello friends!  I am excited to share the last post for my Turtle Friends Spotlight.


This is the Turtle Friends stamp set and Turtle Punch that are 10% off when you buy the bundle.


I love the Party Pattern designer series paper that is exclusive with Stampin' Reward host benefits.  I hope you will enjoy making this card design, follow the instructions below.  The supplies are listed at the end of the post.


COLORS

Basic White

Polished Pink

Basic Black


MEASUREMENTS

Complete list of supplies needed is listed below. A die cutting machine is needed for this card.

Polished Pink:

  • 8 1/2″ h x 5 1/2″ w scored and folded at 4 1/4″ h for Card Base

  • 2″ x 2″ scrap for the Sentiment Matte

Pattern Party Designer Series Paper:

  • 3 3/4″ h x 5 1/2″w

  • 2 3/4″ h x 2 3/4″ w die cut with Scalloped Contours Dies and trimmed to 2 1/2″ square

Basic Black Cardstock:

  • min 1/2″ h x 5 1/2″ w (could be up to 3 15/16″ h)

Basic White Cardstock:

  • 4″ h x 5 1/4″ w for the inside

  • 2″ x 2″ scrap for the Sentiment die cut with the 1 5/8″ Smooth Edge Layering Circles Die

INSTRUCTIONS

  1. Affix all stamps to Acrylic Blocks.

  2. Fold the Card Base in half using a Bone Folder to sharpen the crease.

  3. Attach the Basic Black Cardstock to the 3 3/4" h x 5 1/2" w Pattern Party DSP leaving about 1/8" showing and attach to the Card Base.

  4. Wrap Open Weave Polished Pink Ribbon around the Card Base and tie a bow slightly off center.

  5. Die Cut the 2" x 2" Basic White with the 1 5/8" Smooth Edge Circle and the 2" x 2" Polished Pink with the 1 3/4" Scalloped Circle Die.

  6. Stamp the Turtle in Tuxedo Black Memento Ink and the Shell and Sentiment in Polished Pink Ink on the Basic White 1 5/8" Smooth Edge Circle and attach to the 1 3/4" Polished Pink Scalloped Circle.

  7. Die cut the 2 3/4" h x 2 3/4" w Pattern Party DSP and trim to 2 1/2" square.

  8. Attach the Matted Sentiment to the 2 1/2" square Pattern Party DSP with Dimensionals and attach the 2 1/2" square Pattern Party DSP to the Card Base with Dimensionals.

  9. Sprinkle on the gems.

  10. Stamp and decorate the 4" h x 5 1/4" w Basic White inside and attach with Stampin' Seal.

  11. Decorate your envelope.

  12. Adorable! Who is having a baby girl?

Shop the Online Store


My online store is open 24 hours at http://bit.ly/shopwithJaney

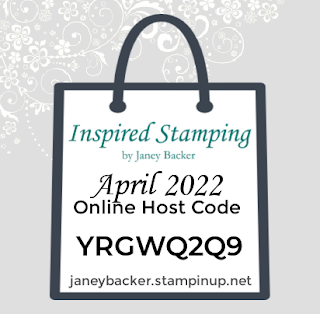
Please use the April 2022 online order 
host code, 
YRGWQ2Q9.

If your order is $150+ then you will earn your own Stampin' Rewards and do not use the host code.
Anyone that orders $35+ of products online, you will receive the April 2022 IDEAS tutorial bundle to show my gratitude!
Customers are also welcome to order the IDEAS tutorial bundle without a product order or to send as a gift (see the side bar for the ordering link).

Subscribe now to never miss a blog post:


Product List
Janey

Monday, January 7, 2019

IDEAS Blog Hop - So Hoppy Together

Hello friends!  Welcome to a new blog hop to share the inspiring projects in our monthly IDEAS tutorial bundle.  The participants are located all around the world and share our creativity to inspire you!  We will each share a peek at our project from the current bundle.

I had a blast designing this card and treat holder for a Valentine's combo set.  Our "So Hoppy Together" stamp set is a gift option during Sale-a-bration. When you place an order for $50 you can select this stamp set as your free gift.  

Each of our projects have written detailed instructions with pictures in each tutorial.  We share the IDEAS tutorial bundle each month.


Each tutorial features at least one card and one project, some include multiples. There are over 20 Valentine cards and treat holders included in this month's bundle! Would you like a copy of the instructions for these projects to use for your personal use, or even to use in your classes? Contact me to find out how to purchase the tutorial bundle or earn it for FREE!
Once you have received the tutorials, please remember not to share or distribute the printed or electronic copies of these bundles. We have worked hard to provide these exclusive projects for your use. If you know someone that would like to purchase the bundle, please direct them to me to obtain their copy. Thanks for your support.

Please click on the Next button below to see the clever projects designed by Judy from Australia.


Please contact me or your demonstrator with any questions.  If you don't have a demonstrator, then I am happy to help you get started with an order.  My online store is open 24 hours at http://bit.ly/shopwithJaney 

All orders over $50 will receive the January IDEAS tutorial bundle.  Please use this online host code:


Orders of $150 will earn their own Stampin' Rewards and the January IDEAS tutorial bundle.

Monday is usually Team Swap Monday.
Wednesday and Friday/Saturday feature designs made by me.


Thank you for joining me today, please leave a comment to say "Hello" - it makes my day to see your comments!
Janey